
How to Check Brake Pads: 7 Easy Checks to Stop Mistakes
Learning how to check brake pads takes about ten minutes. You look at the pad through the wheel spokes. You measure the friction material that touches the rotor. A new pad starts near 10 to 12 mm thick. You should plan a replacement near 3 mm. This guide shows seven easy checks. They cover sight, sound, and pedal feel.
Brake pads press against the rotor to slow your car. The friction material wears down a little with each stop. City driving wears pads faster than highway driving. Towing and steep hills wear them faster still. Most pads last 30,000 to 70,000 miles, says AAA in 2025. Your own check matters more than the mileage number.
Worn pads do more than make noise. They can score the rotor and double your repair bill. Thin pads also stretch your stopping distance. That extra distance matters in a sudden stop. NHTSA found vehicle factors were the critical reason in about 2 percent of crashes. Brakes made up about 22 percent of those crashes, says NHTSA in its 2008 report.
This guide keeps the job simple and safe. You need no special tools for the basic check. A flashlight and a ruler are enough to start. You will learn the visual check, the sound test, and the pedal test. You will also learn when to stop and call a shop. A thin pad is a warning, not a failure, so act early.
[SNIPPET TARGET] To check brake pads, look through the wheel spokes at the pad beside the rotor. Measure the friction material, not the metal backing plate. New pads start near 10 to 12 mm thick. Plan a replacement when the material nears 3 mm. Stop driving and call a shop if you hear grinding or feel a shudder.
ANSWER BOX 1
Look through the wheel spokes with a flashlight and find the pad beside the shiny rotor. The dark friction material sits on a metal backing plate. Measure only that dark layer with a ruler or a simple gauge. A pad near 3 mm needs a replacement soon. A pad near 2 mm needs one now.
ANSWER BOX 2
A high squeal often means the wear indicator is touching the rotor. A grinding sound means metal is touching metal, so stop and get help fast. A soft pedal or a longer stop can also mean worn pads. Check the pads the same day any of these signs appear. Early action keeps a small job small.
KEY TAKEAWAYS
- A new brake pad starts near 10 to 12 mm thick, and 3 mm is the time to plan a replacement.
- Look through the wheel spokes first, and only remove a wheel if you cannot see the pad clearly.
- Squealing means the wear indicator is close, and grinding means you should stop driving and get help.
- Check pads every 10,000 to 15,000 miles, and check them sooner after towing or mountain driving.
- Thin pads can score the rotor, so an early check keeps a cheap job cheap.
Contents
- What are brake pads and how do they work?
- How to check brake pads in 7 easy checks
- Brake pad thickness chart: when to replace
- The 3-sense brake check most guides skip
- 7 mistakes to avoid when you check brake pads
- How often should you check brake pads?
- FAQ
What Are Brake Pads and How Do They Work?
A brake pad is a flat block of friction material on a metal plate. It sits inside the caliper beside the brake rotor. When you press the pedal, the caliper squeezes the pads against the rotor. That friction turns motion into heat and slows the wheel. The pad wears down a little with each stop. The rotor is the shiny disc you can see through the wheel.
Most cars use disc brakes on the front wheels. Many cars use them on all four wheels now. Disc brakes won their first big test at Le Mans in 1953. The Jaguar C-Type was the first car to race there with disc brakes. Tony Rolt and Duncan Hamilton won that race in the C-Type. Their average speed was 105.85 miles per hour, a first for Le Mans.
Pads come in three main types, and each type wears at its own pace. Organic pads are soft and quiet, and they wear fastest. Semi-metallic pads mix metal fibers with resin for a longer life. Ceramic pads last longest and make the least dust. Your car manual lists the type your car needs. Use that type when you buy new pads.
A small metal tab on many pads acts as a wear indicator. It touches the rotor when the pad gets thin. That touch makes a high squeal when you brake. The squeal is a warning, not a fault in itself. Do not ignore it for weeks, because the pad keeps wearing. A quick check after the first squeal saves the rotor.
How to Check Brake Pads in 7 Easy Checks
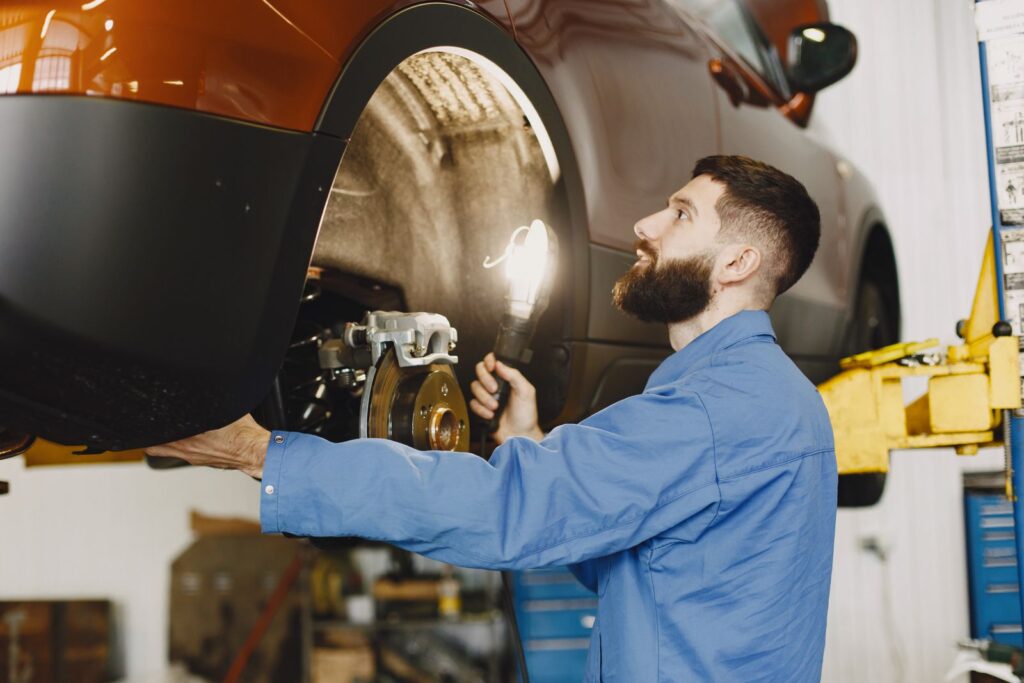
These seven checks run in order from easy to deep. Start with the visual check through the wheel. Move to the sound and pedal checks next. Remove a wheel only if you need a closer look. Work on flat ground with the engine off and the parking brake on.
Step 1: Park Safe and Gather Your Tools
Park on flat ground and set the parking brake. Turn the engine off and let the brakes cool first. Hot brakes can burn your fingers, so wait at least 20 minutes after a drive. Grab a flashlight, a ruler, and a pair of gloves. A simple brake gauge costs little and reads thickness fast. Keep your phone close so you can note the readings.
Step 2: Look Through the Wheel Spokes
Crouch by the front wheel and shine the flashlight through the spokes. Find the shiny rotor, then look for the pad beside it. The pad looks like a dark block pressed against the rotor face. Compare its thickness to the metal backing plate behind it. If the dark layer looks thinner than the plate, the pad is getting low. Check both front wheels, because wear is rarely even.
Step 3: Measure the Friction Material
Hold the ruler or gauge against the pad edge if you can reach it. Measure only the dark friction layer, never the metal plate. New pads start near 10 to 12 mm thick, says Bendix in 2024. Plan a replacement near 3 mm, and treat 2 mm as urgent. Write down the number for each wheel you check. A written record makes the next check easy to compare.
Step 4: Listen for the Wear Warning
Drive slowly in a quiet street and press the brake gently. A high squeal often means the wear tab is touching the rotor. A low growl or grinding sound is more serious. Grinding means the metal plate may be touching the rotor. Stop the car and call a shop if you hear grinding. Do not keep driving to test the sound again.
Step 5: Feel the Pedal and the Steering
Press the pedal at low speed and feel how it answers. A firm pedal that stops the car smoothly is a good sign. A soft or spongy pedal can mean air, a leak, or worn pads. A pull to one side can mean uneven wear. A shudder in the pedal can mean a warped rotor. Note each feeling, because it helps the shop find the fault fast.
Step 6: Check the Rotor Face
Look at the rotor face in the same flashlight beam. A smooth face with light lines is normal wear. Deep grooves or a rough edge mean the pad has worn too far. A blue tint on the rotor means it has run very hot. Rust on a car that sat for weeks is common and often clears with a few stops. Grooves and blue marks need a shop visit, not a wash.
Step 7: Remove a Wheel for a Close Look
Loosen the lug nuts a little while the car still sits on the ground. Jack the car up on a flat spot and set a jack stand under it. Never work under a car held up by a jack alone. Remove the wheel and look at the inner and outer pads. The inner pad often wears faster, so check both sides. Put the wheel back on and tighten the nuts in a star pattern.
Brake Pad Thickness Chart: When to Replace
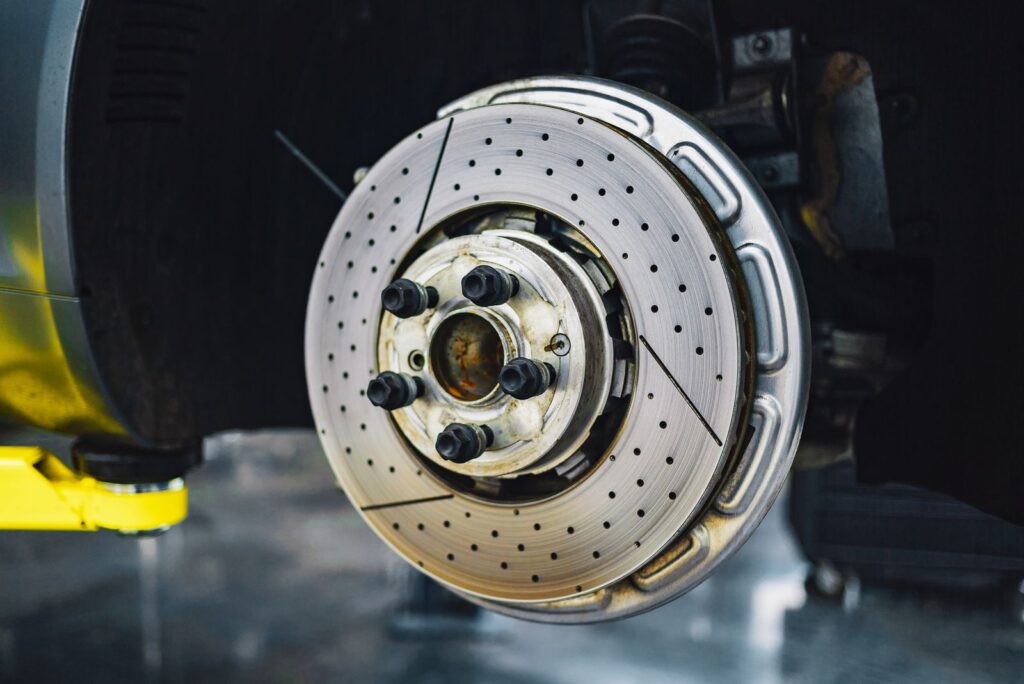
Thickness gives the clearest answer about pad life. Mileage only gives a rough guide, because driving style changes wear a lot. Use the chart below to read your own measurement. Match your number to the action in the right column. Act on the worst wheel, not the best one. One thin pad is enough to book the job.
| Pad thickness | What it means | What to do |
|---|---|---|
| 10 to 12 mm | New pad, full life left | Keep driving and check again at the next service |
| 6 to 9 mm | Normal wear, healthy pad | Keep driving and check again in a few months |
| 4 to 5 mm | Wear is showing, plan ahead | Book a replacement within the next service visit |
| About 3 mm | Replacement zone | Schedule replacement soon, before the rotor is hurt |
| 2 mm or less | Critically thin | Replace now, and ask the shop to check the rotors |
The 3-Sense Brake Check Most Guides Skip
Most guides teach the visual check and stop there. A pad can look fine and still hide a fault. The sound test and the pedal test catch what the eyes miss. This section joins all three senses into one quick check. It takes about 60 seconds, and it needs no tools. Score each sense, then act on the worst score.
Start with look, and give it a score from 1 to 3. A thick dark layer scores 3, a thin layer scores 2, and a bare layer scores 1. Next comes listen, with the same scale. Silence scores 3, a light squeal scores 2, and grinding scores 1. Feel is last in the check. A firm pedal scores 3, a soft pedal scores 2, and a shudder scores 1.
Add the three scores to get a total out of 9. A total of 8 or 9 means the brakes are healthy. A total of 6 or 7 means you should book a check soon. A total of 5 or less means you should call a shop this week. Any single score of 1 means you should act now. The worst sense sets the pace, not the average.
Run this check once a month, and run it after any long trip. It catches wear before it turns into rotor damage. It also builds your feel for the car over time. A driver who knows the normal pedal feel spots change fast. Write the three scores in your phone notes each time. The trend across months tells you more than one check alone.
7 Mistakes to Avoid When You Check Brake Pads
These seven mistakes turn a simple check into a risk. Each one is easy to make, and each one is easy to avoid. Read the list before your next check. Keep it in mind as you work through the steps. A careful check protects your car and your hands.
- Checking hot brakes right after a drive. Hot rotors and pads can burn your fingers fast. Wait at least 20 minutes, then touch only the wheel edge first.
- Measuring the metal plate instead of the pad. The plate never wears, so it always looks thick. Measure only the dark friction layer for a true reading.
- Checking one wheel and trusting the rest. Pads wear at different rates on each wheel. Check all four wheels, or at least both front wheels, every time.
- Ignoring a squeal for weeks. The squeal is the wear tab, and it means the pad is near its end. Book the job in the same week you first hear it.
- Driving on after a grinding sound starts. Grinding means metal is touching the rotor face. Stop, call a shop, and do not drive the car again.
- Working under a car held by a jack alone. A jack can slip, and the result can be fatal. Use a jack stand every time, and test it before you crawl under.
- Skipping the test drive after the check. A visual check alone can miss a soft pedal or a pull. Drive slowly, brake gently, and feel for any change before you trust the car.
How Often Should You Check Brake Pads?
Check your pads every 10,000 to 15,000 miles as a base rule. City drivers should check more often, because stop and go traffic wears pads fast. Highway drivers can stretch the gap a little. Check sooner after towing, mountain driving, or a long road trip. Pair the check with your oil check so it becomes a habit. See our guide on how to check oil level in car without errors: 6 smart steps.
Order new pads online only from a seller you trust. Check the part number against your car manual before you pay. A wrong part wastes a weekend and a return trip. When the parcel ships, track it so you know when it lands. See our guide on USPS tracking number search: 5 proven ways to stop errors.
Small home jobs build the same habit as brake checks. A watch battery swap is a good next job for a careful beginner. It needs steady hands and the right tools, just like a brake check. See our guide on watch battery replacement: 8 powerful steps without mistakes. Keep a simple log of each job you do at home.
Most pads last 30,000 to 70,000 miles, says AAA in 2025. Your driving style sets where you land in that range. Gentle braking and highway miles stretch pad life. Hard braking and heavy loads cut it short. Your monthly check tells you the truth for your own car. Trust the ruler, not the odometer, when you decide.
How to Check Brake Pads FAQ
How do I know if my brake pads are worn?
Look at the pad through the wheel spokes with a flashlight. The dark friction layer should be clearly thicker than the metal plate behind it. A layer near 3 mm means you should plan a replacement. A layer near 2 mm means you should replace the pads now.
How thick should brake pads be?
New pads start near 10 to 12 mm thick, says Bendix in 2024. A pad at 6 mm or more still has good life left. A pad near 3 mm is in the replacement zone. A pad at 2 mm or less needs a change right away.
Can I check brake pads without removing the wheel?
Yes, most cars let you see the outer pad through the wheel spokes. A flashlight makes the pad edge easy to spot. The inner pad is harder to see, so a wheel removal gives a fuller view. Start with the spokes, and remove a wheel only if you need more detail.
What does it mean when brakes squeal?
A high squeal often means the wear indicator tab is touching the rotor. The tab is a built-in warning that the pad is getting thin. It is not an emergency by itself, but you should book a check soon. A squeal that turns into grinding needs help right away.
What does grinding mean when I brake?
Grinding means metal is touching metal, and the pad material is gone. The rotor face is being scored with each stop. Stop driving the car and call a shop for help. A tow costs far less than a new rotor and caliper.
How long do brake pads last?
Most pads last 30,000 to 70,000 miles, says AAA in 2025. City driving, towing, and steep hills shorten that range. Highway driving with gentle braking stretches it. Your own thickness check gives the best answer for your car.
How much does it cost to replace brake pads?
AAA estimates 150 to 350 dollars per axle when only the pads need work. A scored rotor adds cost, because the shop must resurface or replace it. Prices vary by car model and by shop rates in your area. Ask for a written quote that lists pads, labor, and any rotor work.
Should I replace all four brake pads at once?
Replace pads in axle pairs, so both front pads change together. A single new pad beside a worn pad brakes unevenly. The rear pads can wait if they still measure well. Your shop should measure all four and show you the numbers.
Do I need to replace rotors with brake pads?
Not always, because a smooth rotor can serve through two pad sets. A grooved, warped, or very thin rotor needs work with the new pads. The shop measures rotor thickness against the minimum stamped on the rotor. Ask to see the measurement before you agree to rotor work.
How do I check brake pads on a car with alloy wheels?
Alloy wheels often have wide spokes, so the pad is easy to see. Shine a flashlight through the widest gap and find the rotor face. Turn the steering wheel to open the gap on the front wheels. If the spokes are narrow, remove the wheel for a clear view.
Can worn brake pads damage my car?
Yes, worn pads can score the rotor and overheat the caliper. A scored rotor costs more to fix than a pad swap. Worn pads also stretch stopping distance, which raises crash risk. NHTSA found brakes made up about 22 percent of vehicle factor crashes in its 2008 report.
When should I call a mechanic instead of checking myself?
Call a shop if you hear grinding, feel a shudder, or see fluid near a wheel. Call a shop too if the pedal feels soft or sinks to the floor. These signs can mean faults beyond worn pads. A pro check is cheap next to the cost of a brake failure.
Final Word
You now know how to check brake pads in seven easy checks. Look through the spokes, measure the dark layer, and listen for the warning squeal. Score the three senses, and act on the worst score. A pad near 3 mm means you should book the job. A pad near 2 mm means you should book it now.
Keep your brake records with your other key papers, so each check builds on the last. Good records help when you call a shop or an agency about any car matter. See our guide on Social Security phone number: 9 best tips to never miss. Your brakes protect you every day, so give them ten minutes each month. That small habit keeps a cheap job cheap and your car safe.
Read more about disc brakes on Wikipedia: https://en.wikipedia.org/wiki/Disc_brake